Pages

Saturday, January 25, 2014

Simple Valentine Treats for the Kiddos

Valentine's Day is right around the corner. I wanted a simple treat for my 47 second grade students for this special occasion. You read correctly- 47!  (It's because I team teach with an awesome gal! ) 

While looking through my Pinterest boards I came across this cute and simple treat. I was inspired to create my own.


 I pulled out my seasonal stamp stash and created this version.


The rubber stamps came from the dollar bin at Michael's a few years ago.  First, I cut some patterned cardstock from the Dollar Store business card size (2" x 3 1/2"), stamped the images, and then attached a piece of chocolate. I found 10 packs of pencil top erasers while cleaning out the attic during the Christmas holidays. I took the pink and purple erasers from the packs to add to the candy treat.
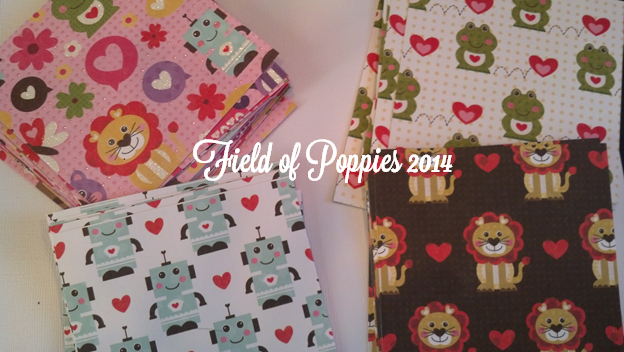
I placed the cards and erasers in a small plastic bag, and cut bag toppers from my Valentine paper stack.

The finished product~


All packaged and ready for my Second Graders~


Thanks for stopping by~

Wednesday, January 22, 2014

Meet Hot Lips: A Chair Makeover

Hubby Jagger bought me a subscription to the HGTV Magazine for Christmas.


While browsing through the magazine, I came to an immediate halt at this page.
WOW! is exactly right. This color is absolutely eye catching, fun, and BOLD.  I definitely wanted to paint something  Hot Lips by Benjamin Moore.


 I quickly texted my booth mate,Melodie, to inquire as to if she had a chair I could paint. (My furniture surplus is very low.) Yippee, she had this chair!  I made a quick dash to the local Ace Hardware to get a sample can of Hot Lips!
 

After a quick sanding, I applied a coat of white primer on the chair.


Then a coat of tinted primer. (I mixed some of the paint with white primer.) I could have easily just tinted the primer at the beginning, however the white, to pink, to hot lips color actually let me see missed spots.


Next came a seat cover choice.  I rummaged through my stash of scraps.  This is what I came up with.

Melodie suggested the black and white brocade as the first choice, however I didn't have enough scrap to completely cover the seat. Our next choice was...

CHEVRON!


I love the end result~


One last before and after~ 
Thanks for stopping by~

Wednesday, January 8, 2014

New Chalk Painted Picture Frames for my booth and Etsy~

Happy New Year Everyone! The last time we hung on on the Field of Poppies blog was back in 2013. I hope 2014 has started with great visions for you~

One of my visions/goals this year is to expand my etsy shop. Today I would like to share with you a picture frame I have created for my booth in an Antique Marketplace with high hopes of becoming part my etsy shop as well.


They're totally Awesome~

Thanks for stopping by~

http://www.etsy.com/shop/justpoppies
https://www.facebook.com/2PoppyGirls

Friday, December 27, 2013

Have you started with the Thank You Cards?...{And a Simple FB Giveaway}

Now that the Christmas Holiday Season is coming to an end, it's time to start thanking all those wonderful people for the FAB gifts you received.  I hand stamped these Thank You cards using a new stamp - Beautifully Baroque- from Stampin' Up for the peeps I need to thank!


 It's a clean and simple card~ 


 The best kind in my book!


Another Variation-


Hop on over to my Facebook page to win your own set. A winner will be chosen at 5:00 p.m.(EST) tomorrow!
https://www.facebook.com/2PoppyGirls?ref=hl

Thanks for stopping by~


Sunday, December 22, 2013

A Gift for my Colleagues

Friday was my last day of school until the end of January- Woot Woot~
Words can't begin to describe the exhaustion my body is feeling at the moment.  
Since Thanksgiving, I've suffered from a sinus infection, the seasonal flu, and a bad, bad, bad cold.  
My body is yelling, "STOP and REST, Girl.! I'm tired! I need to heal! Chill Out a while!"
So, the only gift I'm asking for this year from Jolly Ole' St. Nick is a lot of R&R.

In the midst of all the madness that comes with preparing for the Winter Break with 47  second graders, I managed to create a little Holiday Cheer for my colleagues with a simple gift- a roll of wrapping paper with handmade ornament tags.


http://www.etsy.com/shop/justpoppies


Thanks for stopping by~

Sunday, December 1, 2013

Countdown to Christmas with Thift Store Glassware


It's officially December. 
Have you started counting down?

I made a luminary Advent calendar using glassware rescued from local thrift stores. It was easy to make.  Those of you who have been following me for some time know that I love "easy peasy lemon squeezy" projects, but it has to be visually appealing - aka cute! This project is no different.

Here goes:

Gather 25 uniquely shaped pieces of glassware. Or not so unique. Whatever flats your fancy. Do a quick cycle in the dishwasher.

You'll also need number stickers and spray paint. I chose silver metallic and frosted glass.


 Carefully peel and stick the numbers on the glassware.


I took the glasses outside to my handy dandy paint shop, aka garage. I divided the glasses into two groups- metallic and frosted.  After a few thin coats (allowing the paint to dry 30 minutes between each coat), I peeled off the numbers and allowed the paint to dry for 48 hours. (It took longer for the metallic paint.)

Add tealight candles, and let the countdown begin...
Thanks for stopping by~
Related Posts Plugin for WordPress, Blogger...