Pages

Showing posts with label furniture. Show all posts

Sunday, September 15, 2013

Lamp Makeover with Patterned Burlap

I picked up this ginormous lamp from the a local Goodwill Store.  I immediately fell in love with it.  It was old, rustic, VERY tall- (almost 4 feet tall), and had "POTENTIAL" written all over it. This would be an awesome accent piece in the booth.

As with many of the pieces I find, it came with a few imperfections.


a bad spray paint job...
 

chipped paint...
 
a wavy lampshade...

The wheels immediately started turning for prolonging the life of this beauty.

With a fresh coat of black paint and a piece of beautiful patterned burlap, the lamp hit the runway with a new look.  


(Sorry for the fuzzy pic~)

Like Field of Poppies on Facebook. 
We would love for you to hang out with us.

 We're on the countdown to Fall~
 Are you?


Thanks for stopping by~


Saturday, August 17, 2013

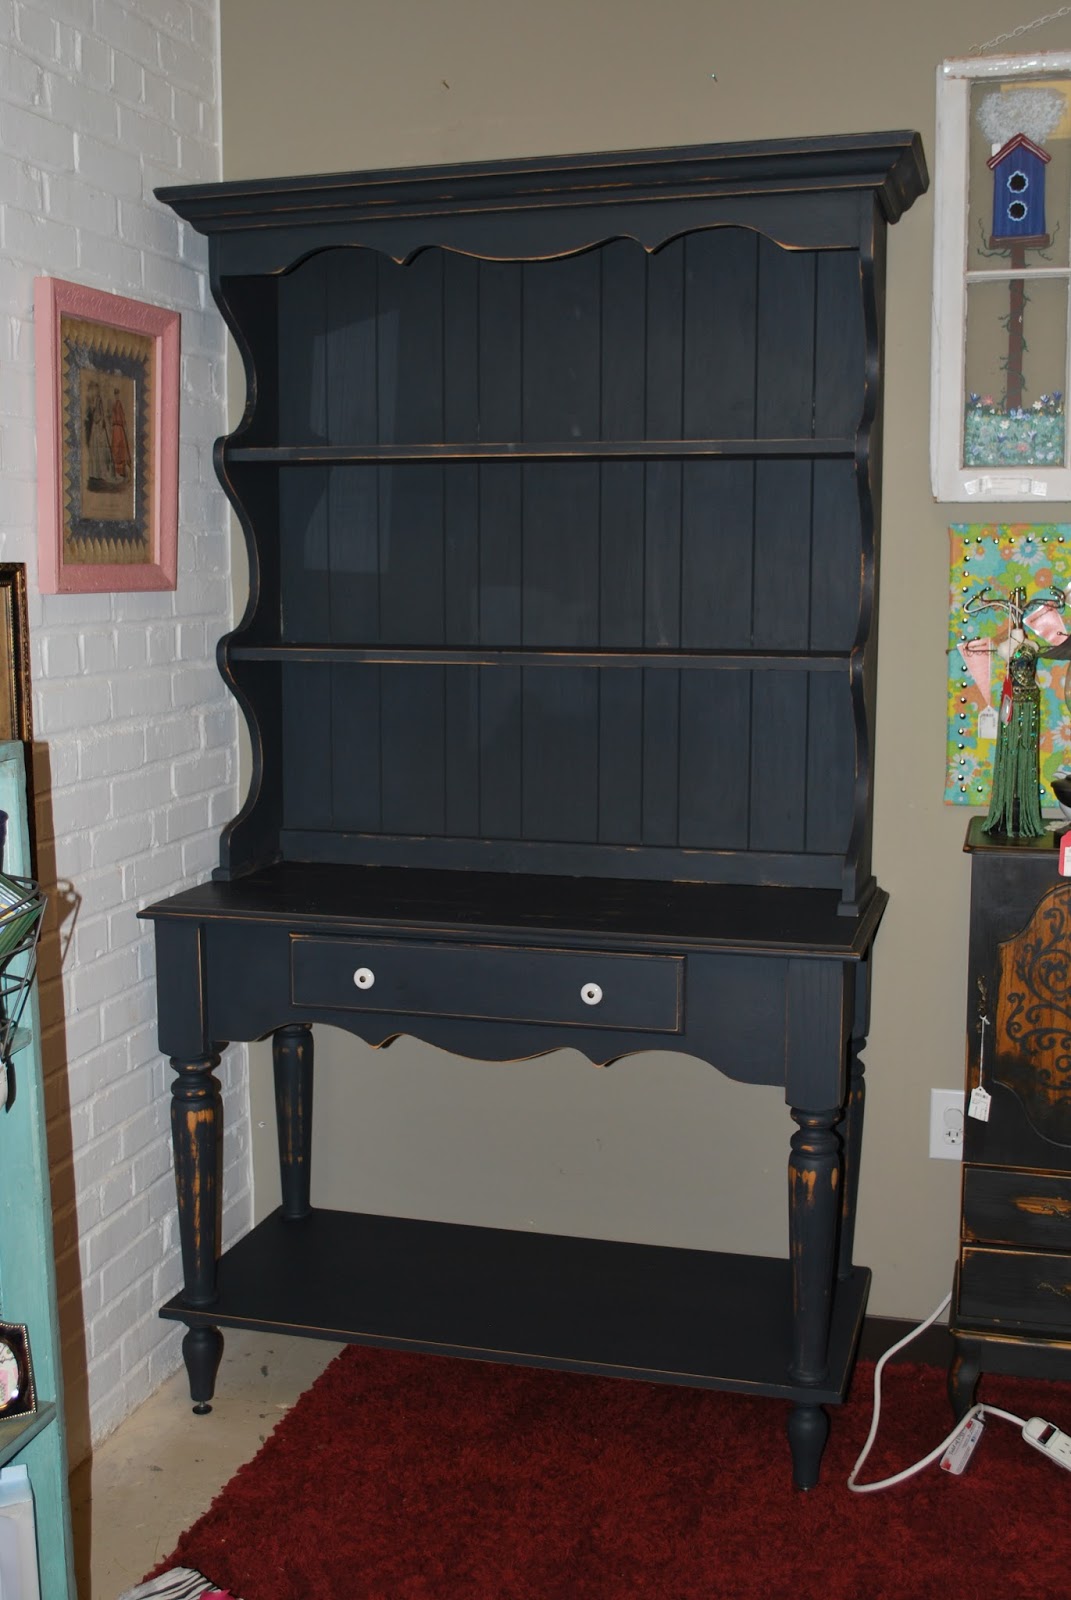
Pottery Barn Style Hutch Makeover

I'm loving the booth I share with my gal pal Melodie. (check out her blog-HERE)


We're a decade apart in age, but it's amazing the talents that each of us bring to the booth.

What has started out as a simple booth filled with handpicked treasures from garage sales, consignment shops, goodwill stores, and local online yard sales is turning into refinishing furniture and vintage finds along with items we create from items we find.  

We're loving it, but can be very exhausting at times.

I am a second grade teacher (beginning year 20- WOW!), and Mel has recently returned to school as a student in the Dental Hygiene field.
I have 3 teens and she has 2 tots.  

We always have projects going. (Our hubbies are always on our backs about our projects and taking up space in the garage or storage buildings.

But we love our time together making our corner of KnB's Marketplace a great place to visit and shop. Our ULTIMATE goal is to one day have our own brick and mortar shop.


Here's one of my latest projects~

I spotted this piece at a recent yard sale.


I should have jumped on it immediately, however my truck was loaded down from discovered treasures of the morning, leaving me no space for anything else. 
I'm also working on not being so impulsive. 
So, I got the owners email and number and decided to make her an offer later in the day if the piece didn't sell.

Well it didn't sell by the end of the yard sale~
So it was totally meant to be!

I brought the two piece set home a few days later.


I mixed my own custom charcoal gray chalk paint. {see post here}
Then painted and distressed it giving the piece a Pottery Barn look.


It's proudly on display in our booth.

A before and after....

Thanks for stopping by~

Follow us on Facebook to keep up with all our furniture makeovers and newly added treasures to our shop~


Thursday, January 10, 2013

Great Games at the Dollar Tree and a Chair Makeover

I don't visit the Dollar Tree often, but on a random recent visit while searching for a mini puzzle for a Pinterest project, I spotted these games on the toy isle.

 Telling Time, Counting Money, Addition, and Subtraction Games
I will use these for my early finishers and my "I'm Finished, Now What? Station"

 These reproducible sheets will come in handy for students who need additional practice with manuscript letter formation and acceleration practice for those ready for cursive.  My kids think cursive is fancy writing and will think its a special treat.

 These timed tests will be great as well for remediation and acceleration.  I'll place these in a basket with a timer.  The students can time themselves or have a friend time them.

 I think this activity will be great for Work on Writing during Daily 5.

Head on out to your local Dollar Tree to snatch up these wonderful classroom deals.

----------------------------------------------------------------------------------------
 This is the makeover chair on display in my consignment shop.  (I love this display.  I'm learning so many things hanging out on Pinterest. I've also become obsessed with my shop.)  

The process was pretty simple.  This chair was originally brown. (Sorry, I don't have a before picture.  Once I get started on a project, I forget I need to take pictures through the whole process.  Sorry~)  It was a chair discarded by the school system I previously worked in.  Being the person I am, I have hoarded it in my storage space for the last 7 years. It was time to clean out the storage and give it a new life.

After two coats of primer, it was time to choose the paint color.  So I just headed down to the Home Depot and stood in front of the spray paint waiting for one to beg me to take it home.

 
Summer Squash yelled the loudest, so I took it home and sprayed the chair with two light coats.  Allow time between each light spray.  Don't rush or get too close.  You want to avoid "runs."

 
Two coats later, this is the result.  Next, I took this picture perfect chair into the garage and roughed it up using my Black and Decker hand sander.


Distress the furniture to your liking.  You really can't go wrong.  I stopped when I got this look.

I've been adding a little water to brown acrylic paint to give my furniture the distressed look, but I decided to try a walnut color by Minwax.

 
It wasn't as easy to work with as my acrylic paint. I'm not convinced that this particular product will continue to hang out on my paint shelf.  I do like that it is water-based versus oil based.  Better on my airways and less stained hands. Here was the chair after an application.


Not too bad.  Overall I like the end product.  The summer squash is a keeper on the shelf.  I'm loving my new found interest in repainting simple pieces of furniture.  And I'm loving all the positive feedback I get from the visitors at the shop.


Thanks for stopping by~


Friday, January 4, 2013

Knock, Knock! Who's There? Another Redo. A Door Makeover.

My last post was about a bar stool redo. (It has already sold in my shop, so I guess I will need to get another one. This time for me.  Fun! Fun! Fun!)

Today I want to share a door redo.  I totally love the way it turned out.  Its story goes a little like this...

On one of my trips to the Habitat for Humanity store a few months ago, I noticed a cart labeled "FREE DOORS" at the entrance.  I immediately stopped in my tracks and began looking through all the freebies.  I'm not sure why others were just bypassing the cart as if it was full cootie bugs.  But then again, I'm glad they did. Because I found a diamond in the rough. Anxiously waiting for me.

Fumbling through the assortment of doors, I noticed doors in all conditions- good, fair, and poor. (All the good ones were inside with price tags on them.) Some had what appeared to be 15 layers of paint, some had major damage with chunks missing, and then I spotted "the door."  No paint, no major damage- Absolutely perfect. It was literally begging for me to take it.  So I did.

I shy away from doors with lots of layers of paint due to having to test them for lead. No way Hosea for me. Too much work. And doors with major damage, well I'm a little creative.  I would be stretching my limits there.  So the plain brown door had potential.  Lots of potential.

I brought her home and placed her against the wall in the garage.  There she stayed for about two months. Last week I pulled her out and gave her a makeover.

I gave the door a light sanding and then painted the front and back with my favorite primer. Two coats.( Don't ever skip out on the priming. You will pay if you do with more work for yourself.)

I

I, then gave the door two coats of Limeade by Valspar Signature. (It's hard to see the color in the picture.) Since the paint color was light, the two coats of primer were definitely needed.  One coat would have left light and dark spots all over the door. Not good. If you notice I left the top insert paintless... for now.


Next, I sprayed the the top section with chalkboard paint to add a little twist.  I also distressed the door front and back with watered down brown acrylic paint. I totally love it.


I displayed the door in my consignment shop.


Well, the wreath I made definitely covered too much of the door.  Who would know it had a chalkboard? So I moved to wreath to a different spot in the booth and added a saying I found on Pinterest.


By the way, today is my one year blogger-versary.  I don't for one moment regret starting this little blog.  I'm hoping in the year to come, that Field of Poppies will continue to grow and be an inspiration to all who visit. Thanks for your comments, encouragement, and support.

Thanks for stopping by~


Wednesday, January 2, 2013

A Little Distress~ Furniture That Is

The holiday's are over.

YAY~

The hustle and bustle of the holiday season is very tiresome for me and a bit overwhelming- the shopping, the cookie exchanges, this Christmas program, that Christmas program, this gift exchange, traveling here and there, and all the cooking.

Don't get me wrong, I love the sights and sounds of the Christmas season, but I'm a bah-humbug for Christmas shopping and looking for the "perfect gift."

Now that the Christmas trees are down, the cookies have been eaten, and the parties are over, I'm looking for a little peace and quiet.

Today is my first official day of track out.  All the kids were back in school and hubby back at work. I had the whole day to myself. Nirvana~

Time to myself means a lot of time to CRAFT.

I picked up a bar stool from a yard sale back in the summer for a very minimal cost.  I used it as a plant stand on the front porch to hold a beautiful plant until a few weeks ago when the plant had to come inside. After very little thought, I decided to "spiff" it up a little.

I used this primer.  To me it's the best. It will hide anything with very little sanding.


I gave the stool two good coats of primer on my craft room floor. Hubby Jagger didn't seem to mind.
 
 
After a few hours, I drug the stool into the garage and sprayed it with a satin Aqua color.  (I just love going into the Home Depot and looking at all the beautiful paint can lids.)I will not use anything other than Rust-Oleum Ultra Cover. It's a little pricey- around $3.50 a can, but it covers sooooo well.  I still have a lot left for my next project which is always a plus.
 
 
After it dried, I  sanded it around the edges, watered down a little acrylic paint, and gave it a little distressed look.
 
 
  This is the final product on display at my consignment shop. (If it doesn't sell by Spring, it will be back on my front porch again.)
 
 
Are you working on any projects? 
 
This week I will also be sharing a chevron desk makeover that I hate.  Stay tuned~
 
 
Thanks for stopping by~


Related Posts Plugin for WordPress, Blogger...