Pages

Showing posts with label recycled/upcycled. Show all posts

Wednesday, January 22, 2014

Meet Hot Lips: A Chair Makeover

Hubby Jagger bought me a subscription to the HGTV Magazine for Christmas.


While browsing through the magazine, I came to an immediate halt at this page.
WOW! is exactly right. This color is absolutely eye catching, fun, and BOLD.  I definitely wanted to paint something  Hot Lips by Benjamin Moore.


 I quickly texted my booth mate,Melodie, to inquire as to if she had a chair I could paint. (My furniture surplus is very low.) Yippee, she had this chair!  I made a quick dash to the local Ace Hardware to get a sample can of Hot Lips!
 

After a quick sanding, I applied a coat of white primer on the chair.


Then a coat of tinted primer. (I mixed some of the paint with white primer.) I could have easily just tinted the primer at the beginning, however the white, to pink, to hot lips color actually let me see missed spots.


Next came a seat cover choice.  I rummaged through my stash of scraps.  This is what I came up with.

Melodie suggested the black and white brocade as the first choice, however I didn't have enough scrap to completely cover the seat. Our next choice was...

CHEVRON!


I love the end result~


One last before and after~ 
Thanks for stopping by~

Wednesday, April 10, 2013

Chalk Paint and a Table Makeover

Chalk paint.
Milk paint.
Chalkboard paint.
 
These types of paints are all the rage these days in the furniture consignment and shabby chic market.
This week I decided to make my own chalk paint.
I do have Anne Sloan chalk paint, but I'll discuss that product at a later time.
Chalk paint is easy to make.
 
You'll need:
Plaster of Paris
Flat Latex Paint
Hot Water
Small Plastic Mixing Bucket
Paint Stick for Mixing
 
Mix 1/2 cup of hot water and 1/2 cup of Plaster of Paris together in the plastic mixing bucket.  Mix thoroughly with the paint stick.  A mixer will work for this step as well.  However, the mixer should be for paint only- not food preparation.  You want to eliminate any and all lumps.  Next, mix 1 1/2 cups of a latex paint of your choice with the Plaster of Paris mixture. I used a quality sample paint from Sherman Williams. Again, mix thoroughly.
 
The above recipe works great for me.  I love the consistency- not too thick or too watery.  However, feel free to add more Plaster of Paris if you want the chalk paint thicker.  The Plaster of Paris will also lighten the latex paint color slightly. I had extra paint left over and stored it in a covered glass jar to use for a future project.
 
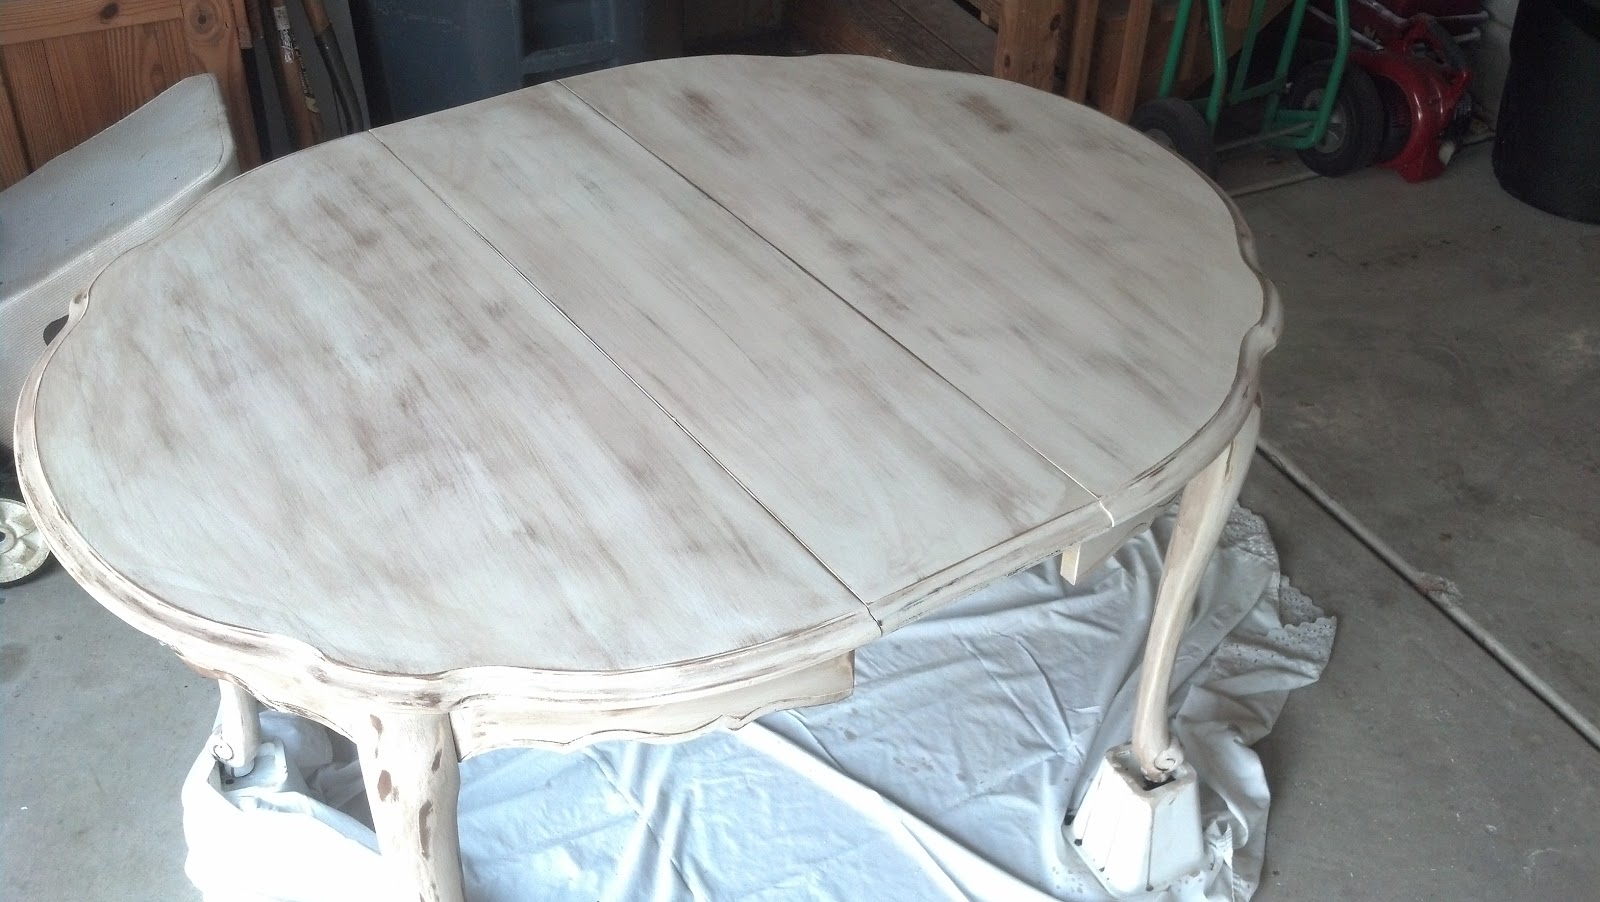
I picked up a table from The Salvation Army.  I loved it's shape, but it was UGLY!  This table was a great chalk paint project.  With chalk paint, you do not have to sand or prime. Just apply the mixture with a good quality brush.  Woo Hoo!  Because the top of the table had a glossy finish, I decided to sand it down to the bare wood before painting. Again, it was not necessary, just a personal preference.
 
Enjoy the photos~
Sorry, I do not have any before pics.  I always forget to take pictures until I'm halfway or even finished with the projects.


I applied two coats of chalk paint to the table and sanded it to give it a distressed, shabby look.  I followed up by applying 5 coats of Polyacrylic to seal it.  Polyacrylic is waterbased.  Oil based products have an unbearable smell for me so I don't use them.


A close up of the top.  Halfway through the sanding process, my hand sander broke.


I finished the sanding process by hand. A lot of muscle work but worth every sore muscle I had the following day.


This is the finished product waiting to be adorned in one of my shops.  She is a beauty if I say so myself.  She even has a removable leaf- an extra bonus.
 
 
She is now in her spot in my booth awaiting the perfect owner to come along and take her to a new home.
 
Have you had any experiences with chalk paint? Please share!
 
Thanks for stopping by~


Sunday, April 7, 2013

Discarded Book Journals: A Tutorial

This week I will be participating in this local outdoor event with a very creative friend of mine.

 
We will be marketing in the Artist and Crafters Market.  I've created unique journals to sell in our booth.  I create journals from discarded books, which I display in one of my consignment corners.  Each journal is unique and has a story of its own. I LOVE, LOVE books, and I'm a sucker for patterns.  I have been lucky to find a batch of Reader's Digest books at a college bookstore at a very minimal price.  I love the Reader's Digest books because the book covers are very decorative, super cute, and have great patterns. 
 
 
A few samples from my most recent book store scavenger hunt.  Look at all the patterns and colors.
 
 
To begin the transformation process, I use an Xacto knife to remove the bound pages from the book.


I am left with the front and back covers of the book.


Sometimes I save the gutted pages for other projects.  However, this time, I will place the pages in the recycling bin.  Still good though, right?


This is what I'm left with. What an assortment!


Using a heavy duty paper cutter, I remove the front and back covers from the spine.


It is easy to do.  No real muscle work required in this step.  The muscle work is coming soon.


I band the front and back covers together.  It's easier to keep up with the pieces this way.


I save the spines that were not damaged in the cutting process.  I will eventually transform them into bookmarks.  That will be another tutorial later.


I take the measurements of the book over.


I always round down to the nearest quarter of an inch.  I don't do well with cutting paper into eighths.


It doesn't take long to whip through the stack of books I have.  I'm loving the covers more and more. How about you?


Now it's paper cutting time. I prefer using colored paper, however from time to time I will use plain white.  It is definitely not my first choice.


I cut 80 sheets of paper for each journal at 5" x 7 1/2".  Luckily, I can get two pages from one sheet of paper with little waste.  Again ,I band this step to keep the materials for each journal together.


I add a pocket to the front of each journal for tags and small paper items.  To do this I take a 12"x12" piece of  double sided scrapbook paper and cut it down to 10"x10".  I then score it horizontally at 7 1/2", turn the paper and score vertically at 5".  Fold the 
7 1/2" score line up creating a pocket and fold the 5" score line in half creating a page. EASY~


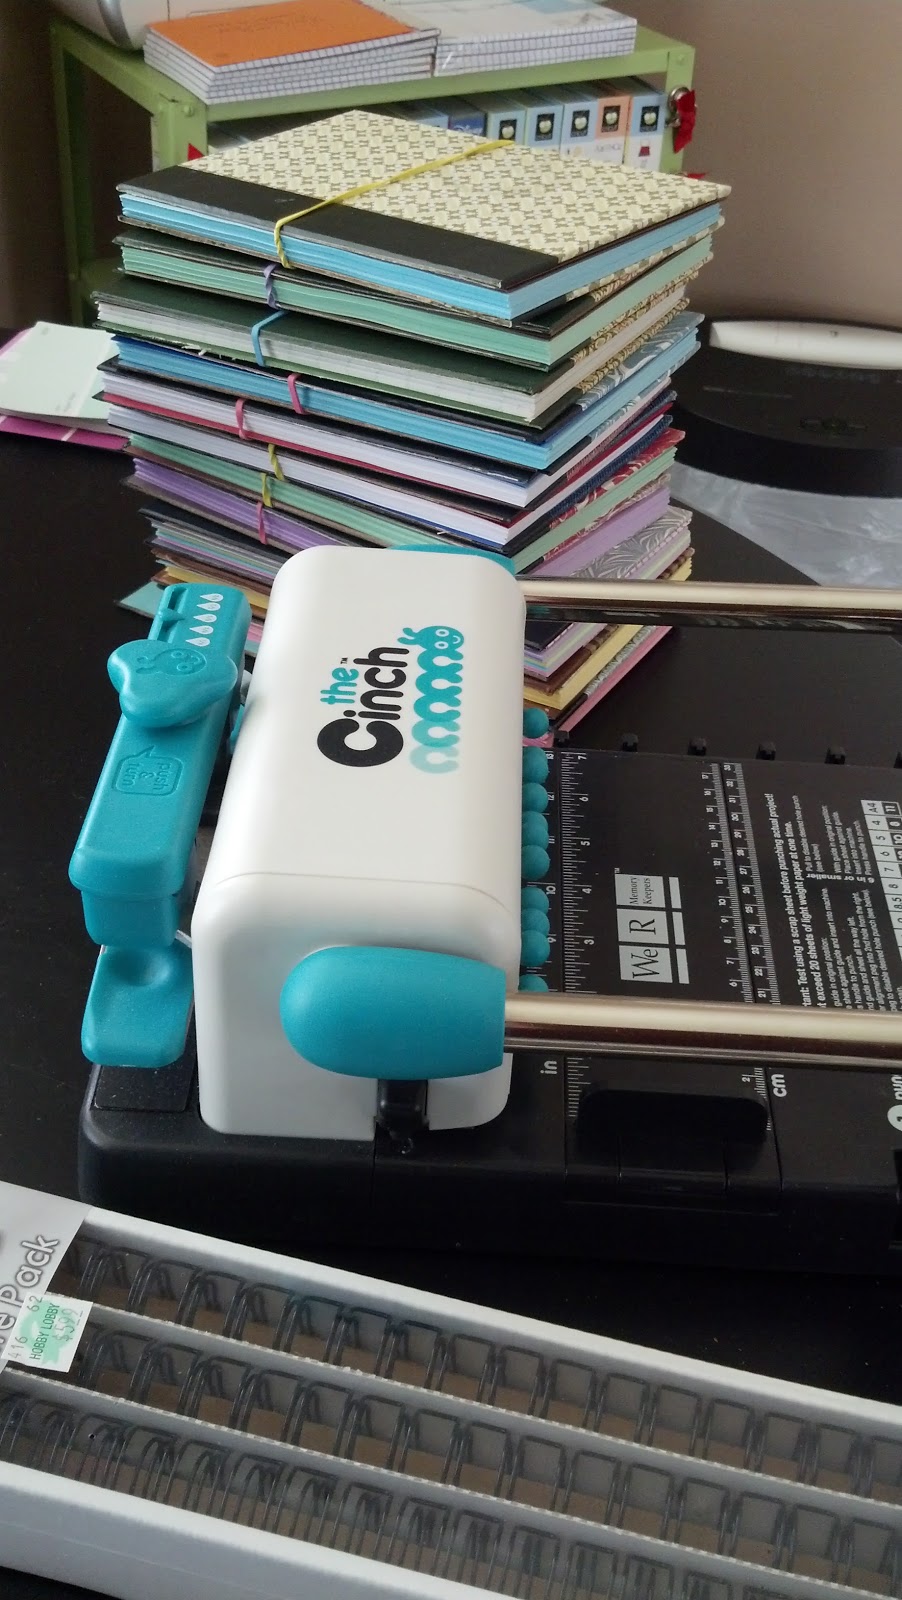
I, then use my Cinch to begin the book binding process.  Punching the holes into each book is the most time consuming and labor intensive.  I really have to flex my muscles doing this step. 


After punching all the books, I band them again.  All the banding is not necessary if you are only doing one book, but I have almost a dozen today.


This is a view of the front pocket. 


The finished books on a trial run display on the dining room table.
 
 
I created 11 journals in a few hours.  I will be making a few more to fill the display rack.  I will be adding the journals I don't sell to my etsy shop after the show.
 
I hope you enjoyed the tutorial~
Thanks for stopping by!

Thursday, January 10, 2013

Great Games at the Dollar Tree and a Chair Makeover

I don't visit the Dollar Tree often, but on a random recent visit while searching for a mini puzzle for a Pinterest project, I spotted these games on the toy isle.

 Telling Time, Counting Money, Addition, and Subtraction Games
I will use these for my early finishers and my "I'm Finished, Now What? Station"

 These reproducible sheets will come in handy for students who need additional practice with manuscript letter formation and acceleration practice for those ready for cursive.  My kids think cursive is fancy writing and will think its a special treat.

 These timed tests will be great as well for remediation and acceleration.  I'll place these in a basket with a timer.  The students can time themselves or have a friend time them.

 I think this activity will be great for Work on Writing during Daily 5.

Head on out to your local Dollar Tree to snatch up these wonderful classroom deals.

----------------------------------------------------------------------------------------
 This is the makeover chair on display in my consignment shop.  (I love this display.  I'm learning so many things hanging out on Pinterest. I've also become obsessed with my shop.)  

The process was pretty simple.  This chair was originally brown. (Sorry, I don't have a before picture.  Once I get started on a project, I forget I need to take pictures through the whole process.  Sorry~)  It was a chair discarded by the school system I previously worked in.  Being the person I am, I have hoarded it in my storage space for the last 7 years. It was time to clean out the storage and give it a new life.

After two coats of primer, it was time to choose the paint color.  So I just headed down to the Home Depot and stood in front of the spray paint waiting for one to beg me to take it home.

 
Summer Squash yelled the loudest, so I took it home and sprayed the chair with two light coats.  Allow time between each light spray.  Don't rush or get too close.  You want to avoid "runs."

 
Two coats later, this is the result.  Next, I took this picture perfect chair into the garage and roughed it up using my Black and Decker hand sander.


Distress the furniture to your liking.  You really can't go wrong.  I stopped when I got this look.

I've been adding a little water to brown acrylic paint to give my furniture the distressed look, but I decided to try a walnut color by Minwax.

 
It wasn't as easy to work with as my acrylic paint. I'm not convinced that this particular product will continue to hang out on my paint shelf.  I do like that it is water-based versus oil based.  Better on my airways and less stained hands. Here was the chair after an application.


Not too bad.  Overall I like the end product.  The summer squash is a keeper on the shelf.  I'm loving my new found interest in repainting simple pieces of furniture.  And I'm loving all the positive feedback I get from the visitors at the shop.


Thanks for stopping by~


Related Posts Plugin for WordPress, Blogger...