Pages

Tuesday, June 25, 2013

June Tag Swap

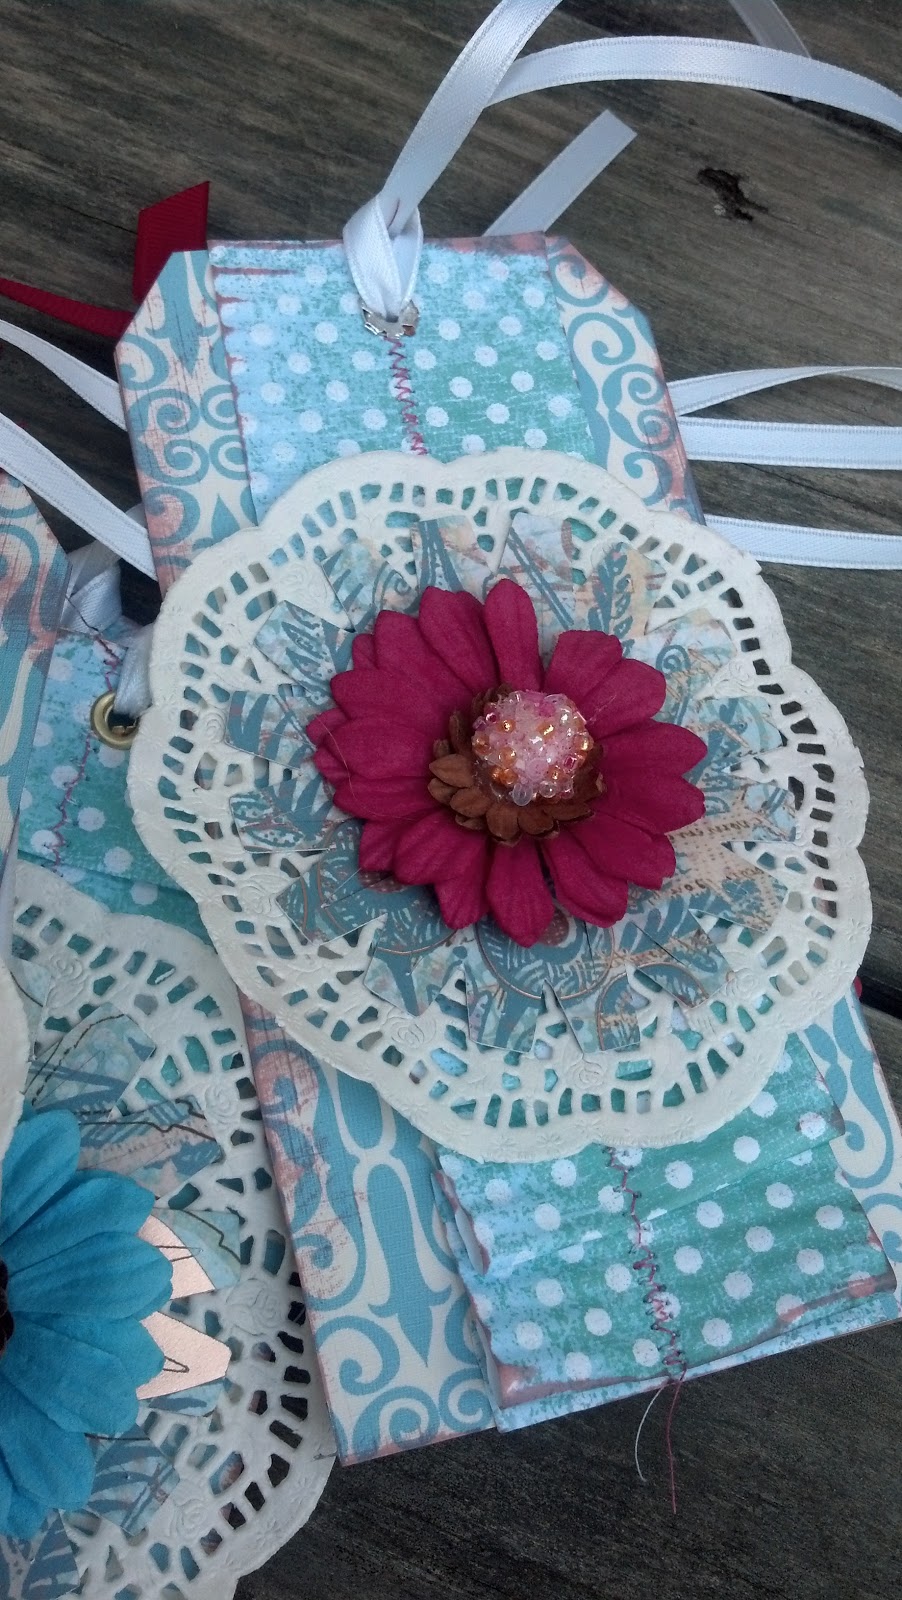
Last month I told you about a tag swap I was participating in at le Petit' Crop Shoppe. 
This is what I received in the mail last week from the gals.
Click (here) to get another glimpse of the tags.  
My tag is in her first photo. (Insert happy face.)
A wide range of talent from these girls.
I'm feeling like such a total underachiever when paired with this creative bunch. 
I did, however, have a great time creating my tag.
Lindamae is hosting another tag swap.
Want to join her? Click here!
Enjoy!


Thursday, June 13, 2013

One Down, Two To Go: Graduation 2013

Our oldest son graduated from high school yesterday in a hour long ceremony at the Raleigh Convention Center in the Capital City.  He was 1 of 523 students at his high school to receive this prestigious  honor- a high school diploma.  A lot more students than the 92 I graduated with more than 22 years ago.


My hubby invited family over for a pre-graduation party.  Unfortunately, the timing was horrible because we are installing hardwood floors downstairs. My kitchen looked like this...
 
and the stove was sitting here...
 
 
in the middle of the dining room.  So that meant no cooking for me.  So I quickly put a plan into action because hubby didn't want to call off the "party." We decided to have the party in the graduates bedroom.  He has the bonus room upstairs so it was plenty big. This is what we came up with...


We put up a few decorations outside and enjoyed a pre-graduation party, even with all the banging and slamming downstairs from the installers.
 
 
 I made a few party favors for our guests.  Ironically, his high school colors are the same as East Carolina- his college choice for the fall.
 
 
The party turned out better than I expected, and so glad that everyone enjoyed their time together for this momentous occasion. 
 
Enjoy the photos~
 
 
The grad with grandparents.
 
 
Me and hubby with Michael
 
 
Three generations of Johnson boys
 
 
Michael with one of his best buds
 
 
Michael with Great Grannie
 
 
Michael, Sister Jess, and Aunt Sue
 
Congratulations Michael!
WE LOVE YOU~
 
Now that's one grad down, two more to go!
Thanks for stopping by~


Sunday, June 2, 2013

An Easy Owl Burlap Door Hanger


It's EVERYWHERE~
A lot of decor I see these days has a commonality- BURLAP!
I love burlap~
The smell (yea, I know I'm in the minority with this one.  I worked in the fields as an adolescent, so I had the opportunity to bond with tobacco burlap bags more than most people my age.), the texture, the naturalness, and it's flexibility of uses. It can do most anything.

We have three AwEsOmE ladies on my second grade team who have chosen different paths next year. (Insert sniff, tear, sniff, tear)
Two of them big puffy heart OWLS, so I thought I would make an "until next time" gift from this fun material.

I saw these cuties on etsy.


I'm not going to reinvent the wheel of tutorials with this project because there are so many tutorials out there in blogland, they will make your head swim. So I've found a few simple ones to use as models. Head over to The Francis Family and Junque 2 Jewels. They each have great tutorials.   I modified each of these a bit to make them work for me.

The final results~


Thanks for stopping by~


Sunday, May 19, 2013

Tag Swapping

I was asked by a couple of gals a little over a month ago to join a tag swap over at le Petit' Crop Shoppe.
Lindamae is hosting this quarterly swap.
I haven't participated in a swap in quite some time, so I thought, what the heck I'll give it a try.
I've been putting all my efforts into my booths lately, that I've neglected my papercrafting.
This opportunity gave me a chance to reconnect with my punches, scrapbook paper, and cricut. 
 I hope the gals enjoy my tag creation.


Thanks for stopping by~

Sunday, May 12, 2013

A Chair For My Mother

I am lucky to have a mom who still enjoys handmade items from me even at my age.
 
I sooooo love this about her. 
 
Besides, I get my craftiness from her, so the apple didn't fall far from the tree. 
 
I saw a chair makeover on a local site, and knew my mom would love a similar look.
 
My booth mate had the perfect chair.
 
She painted it "cloud" blue from our line of handmade chalk-like paint and removed the seat.
 
Love, Love, Love~
 
 
I distressed and waxed it to add a little more "shabbiness."
 
 
 I made a quick trip to the local Michael's Arts and Crafts store and purchased a precut letter "M" and a burlap bow. (Don't forget your coupon.)
I attached the materials to the back of the chair.
 
 
I added a beautiful fern from Home Depot in the "seat" part of the chair frame.


I tried it out on my porch for a couple of days before giving it to my mom.
 
My mom had the perfect spot on her patio. (My mom has a knack for decorating, that unfortunately, I didn't get.)
 
Happy Mother's Day!
 
Thanks for stopping by~


Wednesday, April 10, 2013

Chalk Paint and a Table Makeover

Chalk paint.
Milk paint.
Chalkboard paint.
 
These types of paints are all the rage these days in the furniture consignment and shabby chic market.
This week I decided to make my own chalk paint.
I do have Anne Sloan chalk paint, but I'll discuss that product at a later time.
Chalk paint is easy to make.
 
You'll need:
Plaster of Paris
Flat Latex Paint
Hot Water
Small Plastic Mixing Bucket
Paint Stick for Mixing
 
Mix 1/2 cup of hot water and 1/2 cup of Plaster of Paris together in the plastic mixing bucket.  Mix thoroughly with the paint stick.  A mixer will work for this step as well.  However, the mixer should be for paint only- not food preparation.  You want to eliminate any and all lumps.  Next, mix 1 1/2 cups of a latex paint of your choice with the Plaster of Paris mixture. I used a quality sample paint from Sherman Williams. Again, mix thoroughly.
 
The above recipe works great for me.  I love the consistency- not too thick or too watery.  However, feel free to add more Plaster of Paris if you want the chalk paint thicker.  The Plaster of Paris will also lighten the latex paint color slightly. I had extra paint left over and stored it in a covered glass jar to use for a future project.
 
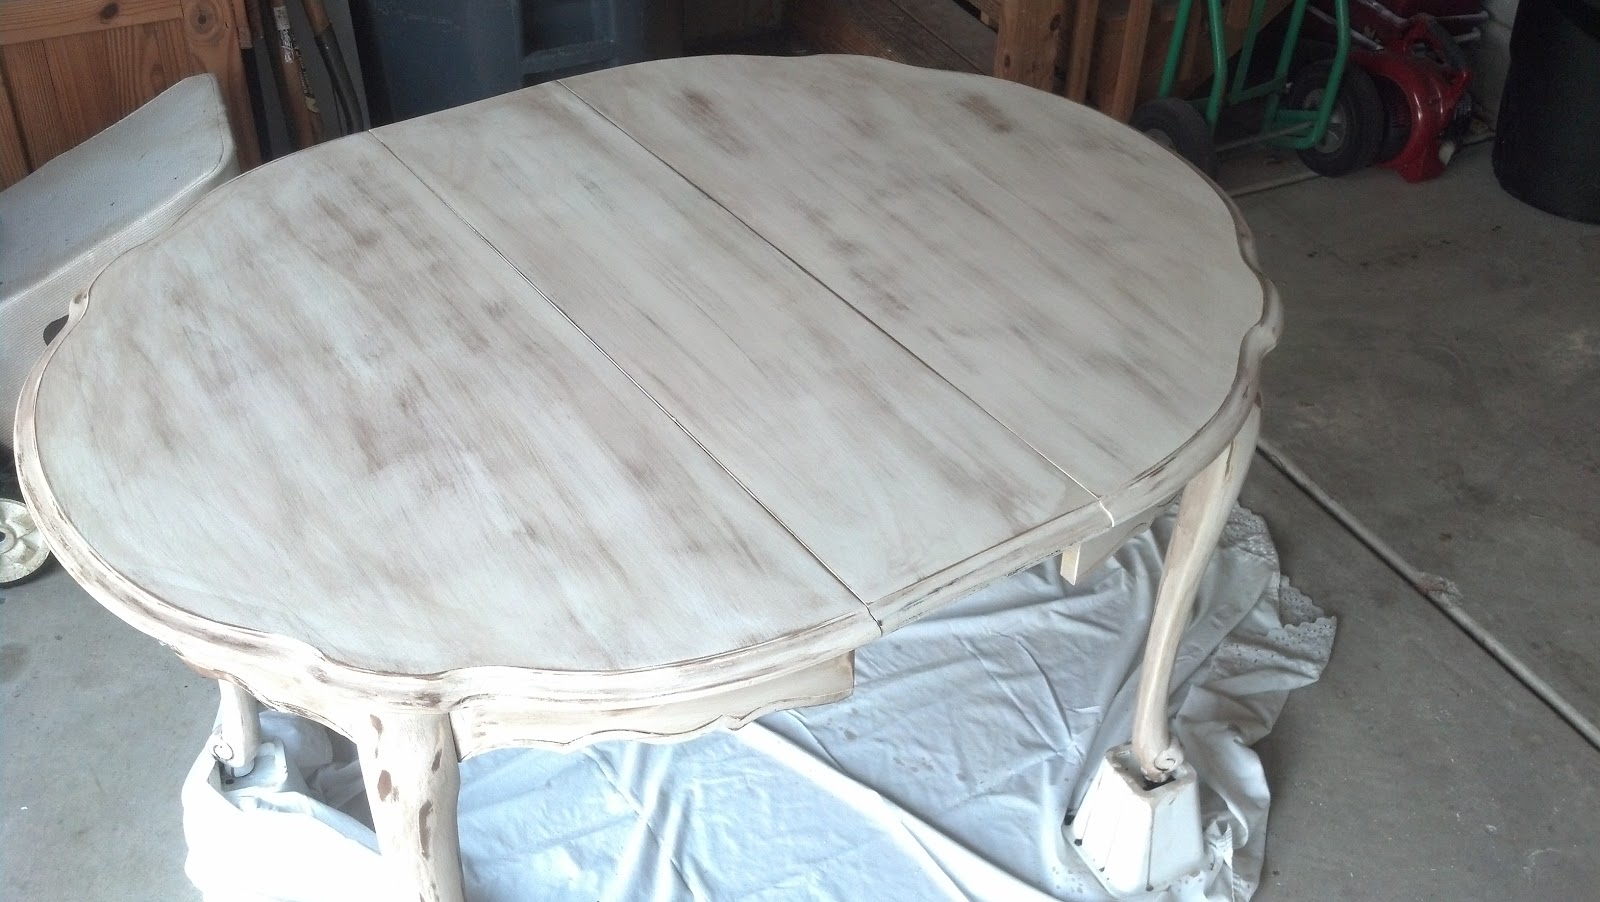
I picked up a table from The Salvation Army.  I loved it's shape, but it was UGLY!  This table was a great chalk paint project.  With chalk paint, you do not have to sand or prime. Just apply the mixture with a good quality brush.  Woo Hoo!  Because the top of the table had a glossy finish, I decided to sand it down to the bare wood before painting. Again, it was not necessary, just a personal preference.
 
Enjoy the photos~
Sorry, I do not have any before pics.  I always forget to take pictures until I'm halfway or even finished with the projects.


I applied two coats of chalk paint to the table and sanded it to give it a distressed, shabby look.  I followed up by applying 5 coats of Polyacrylic to seal it.  Polyacrylic is waterbased.  Oil based products have an unbearable smell for me so I don't use them.


A close up of the top.  Halfway through the sanding process, my hand sander broke.


I finished the sanding process by hand. A lot of muscle work but worth every sore muscle I had the following day.


This is the finished product waiting to be adorned in one of my shops.  She is a beauty if I say so myself.  She even has a removable leaf- an extra bonus.
 
 
She is now in her spot in my booth awaiting the perfect owner to come along and take her to a new home.
 
Have you had any experiences with chalk paint? Please share!
 
Thanks for stopping by~


Related Posts Plugin for WordPress, Blogger...