Well, over the past few years, I've only had maybe two books per book fair donated to my class library. Don't get me wrong, I'm always thankful for each and every book donated. But I wasn't going to set myself up hoping for lots and lots of books and then be let down. So I didn't get my hopes up too high when the Spring book fair rolled around this year.
Last week, I grabbed my basket labeled with my name and "shopped" around the book fair and carefully placed books into my wish basket. I chose books that would really supplement the new Common Core Standards and would create interest for my students. After my selections, I placed my book basket in its designated place amongst the letter "M's" on the teacher shelf and didn't look back.
Well low and behold, the next day one book came in, the following day two more books came in. Oh my goodness~ books and more books and even more books. My heart smiled a ginormous smile.
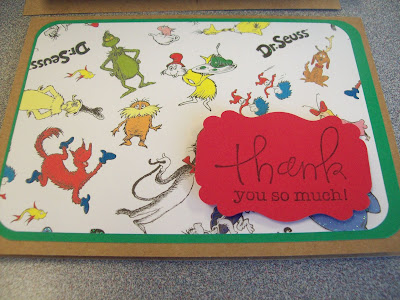
In honor of Dr. Seuss and the generous book donations from my kiddos (and their mommies and daddies), I arrived at school super early this morning to make these thank you cards. I really wanted them to know how much I appreciated their thoughtfulness and generosity.
Want to make your own? Here's how~
- Gather your materials
Dr. Seuss themed scrapbook paper. Jo Ann fabrics had it for 50 cents per sheet this week.
Coordinating card stock. When I think of Dr. Seuss, these are the colors I think of.
5 1/2" x 4 blank note cards (I'm partial to Kraft) , black stamp pad, thank you stamp of your choice, dimensionals
Cutting board, ATG or some type of adhesive, corner rounder (optional), tag punch
I cut the colored card stock into 5 1/4" x 3 3/4" pieces.
I cut the patterned Dr. Seuss paper at 5" x 3 1/2".
I rounded the edges on the solid card stock and patterned paper. I decided against rounding the edges of the Kraft blank card. I liked the hard edge.
All the paper is cut. I cut a 5 1/4" x 3 3/4" white piece for the insert for each card.
I used this stamp to create a sentiment on red paper.
I then used my EK Success tag punch to punch out the sentiments.
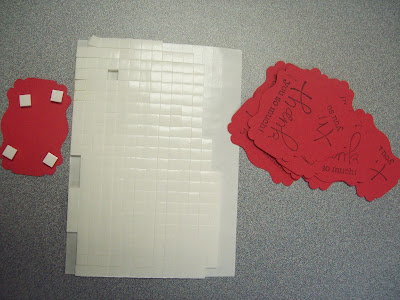
I added small dimensionals to the back of each sentiment.
I layered the pre-cut pieces onto the blank notepad.
I am impressed with the way the cards turned out. After writing the thank-yous during my planning, I eagerly gave the cards to my kiddos to take home. I heard one kiddo saying to another, "Wow, I got a special treat from Mrs. M. I can hardly wait to show my mom." Insert <happy teacher.>
I hope you have a Seuss-tacular week~
Thanks for stopping by!


Super cute! Thanks for the tutorial; I might have to try this one!!! :)
ReplyDelete~Jen
Hello Mrs Sykes
I love these, I love these, I love these!!! It ALMOST makes me want to unpack all of my craft paper to make some thank you cards for the very same reason. Awesome tutorial btw! :)
ReplyDeleteCasey